
How to Choose the Right Harness for Work at Height
Welcome back. I’m writing again with the goal of adding small but important details to your knowledge that can help you work more safely. This time, the topic is work at height.
As you may have noticed in my previous articles, although safety topics are often explained using highly technical language, I prefer not to rely on that approach. The purpose of these articles is to spare the reader from having to pause and search Google or Wikipedia while reading. My objective is for you to understand the basic safety principles in a single read and quickly interpret the meaning of protocols and standards (which, of course, do use very technical terminology). I hope you enjoy it.
Now, let’s begin with the topic of this article.

As you read in the title, my goal is to help you choose the harness for work at height that best fits your needs. Many times, we find ourselves limited because the harness we are using does not help us perform the task at hand due to the limitations of its components.
When I refer to “limited components,” I mean that the harness configuration may not assist us in certain situations when working at height. I am not saying that there are harnesses that do not work for work at height—ALL harnesses are designed for work at height. However, their configurations and components depend on the complexity of the job to be performed. It is common to discover that our harness is not prepared for certain situations because it lacks the appropriate elements required for the task we are exposed to.
For example, a simple harness used to work on scaffolding, consisting only of webbing and a single back D-ring for connecting a lanyard or lifeline, will not be suitable if we need to perform a rescue. It is not a rescue harness and does not include the necessary elements for that purpose.
Although this example compares two very different activities (work at height and rescue), harnesses used for work at height come in different configurations that create small but very useful differences. These differences allow the user to adapt to a wider range of scenarios while working at height.
NOTE: Rescue at height is a branch derived from work at height (you will see why).
Before we get too “technical” about the functions of the different harnesses available on the market, let me first remind you of the minimum characteristics a harness must have in order to be considered suitable for work at height (you can find this in any safety standard).
For a harness to be considered suitable for work at height, it must have the following characteristics:
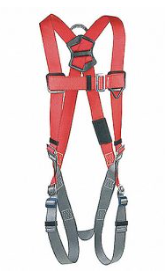
- The harness must have a label indicating the date of manufacture, the standard it complies with, and its certification. This ensures that the harness has not expired, meets minimum safety requirements, and that all information has been verified.
- The harness must be made with flat webbing that is 1.7 to 2 in wide (43 to 50 mm) in order to distribute the impact force over a larger area in the event of a fall. Imagine if the harness were made of thinner webbing or rope—during a fall, the impact could cause serious injury by cutting into a vein or artery.
NOTE: If the webbing is narrower than this, it must be covered or padded to achieve the required width. This is not about strength, but about comfort and force distribution. There are very thin webbings that are extremely strong. - The harness must include leg straps to prevent it from slipping off the user in the event of a fall. (Body belts are not permitted for fall protection.)
- The harness must have a back D-ring. This is considered the primary D-ring because it is where the fall arrest connector is attached (part of the personal fall protection system).
- The harness must have a minimum strength of 5,000 lb (2,267 kg).
NOTE: In another article, I will discuss the importance of why the harness, like every other part of the fall protection system, must be capable of supporting this minimum strength.
What we have reviewed above is the minimum, but mandatory, requirement for a harness to be considered suitable for work at height. Now, starting from this simple base configuration, we will begin adding elements so you can see how a harness can perform additional functions.
The main difference between the various harness models used for work at height lies in the addition of elements that allow the harness to perform one or more extra functions. For example, a rescue harness can also be used for work at height because it includes all the elements required for working at height, plus additional features that allow it to be used for rescue.
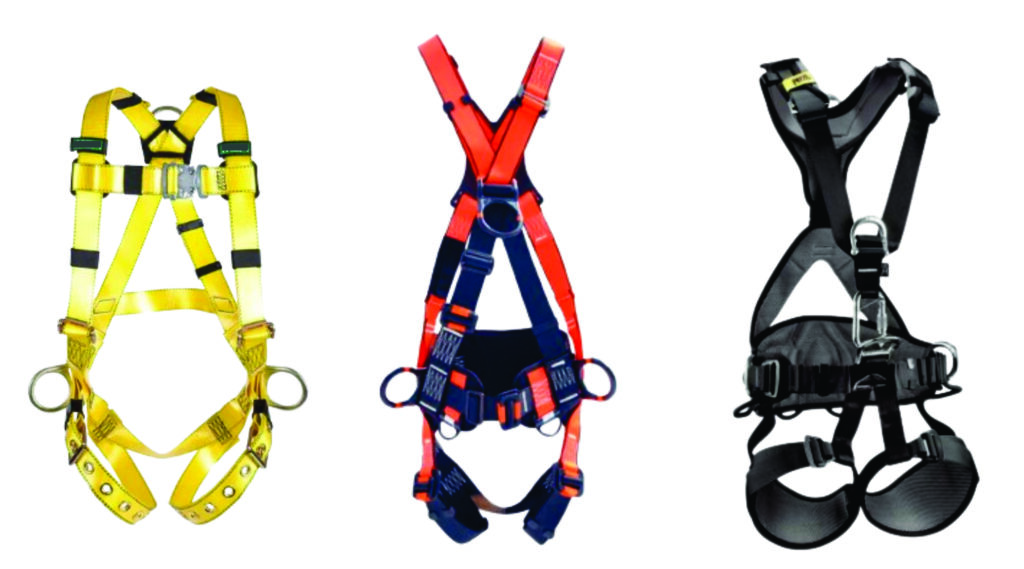
I know the previous example may seem a bit extreme, since a harness for work at height is very different from one designed for rescue. However, remember that for both to be used at height, they must meet the same minimum required characteristics.
Let me explain how to differentiate harnesses based on their function.
In my opinion, you should ignore the different shapes and designs you see among harnesses. Each manufacturer chooses how to route and stitch the webbing, and some designs can be more unconventional than others.
Although there are often noticeable differences in the way harnesses look, appearance is not what defines their function. What truly defines a harness’s function is the number of D-rings it has. As the number of D-rings increases, the harness gains one or more additional functions. When a D-ring is added to a harness, it retains all the functions it already had, while adding new capabilities provided by that extra D-ring.

To make this clearer, let’s start adding D-rings and see what additional function or functions the harness gains:
Single D-Ring Harness
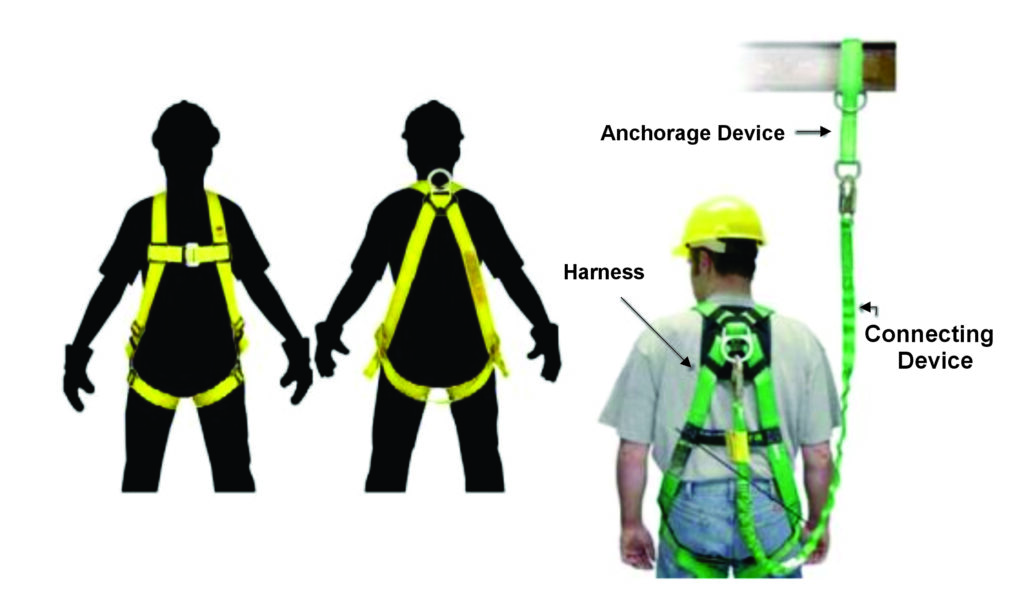
This is considered the most basic type of harness. Depending on the brand, it may only meet the minimum characteristics mentioned earlier. It has a single back D-ring (dorsal D-ring), whose function is to connect the fall protection system, such as a shock-absorbing lanyard or a self-retracting lifeline, both very common in work at height.
Three D-Ring Harness
This harness is very similar to the previous one, but in addition to the back D-ring, it also includes two extra D-rings located on each side of the waist. These are known as positioning D-rings, and their purpose is to connect a positioning lanyard that allows you to work hands-free when necessary.
WARNING!!! Using a positioning lanyard does not eliminate the need to use your primary fall arrest connection. These positioning D-rings are not designed to withstand the same forces as the back D-ring. As mentioned earlier, we will discuss impact forces in another article, but trust me—these rings are not intended to support the impact of a fall.
(It performs all the functions of the previous harness, and more.)
Four D-Ring Harness
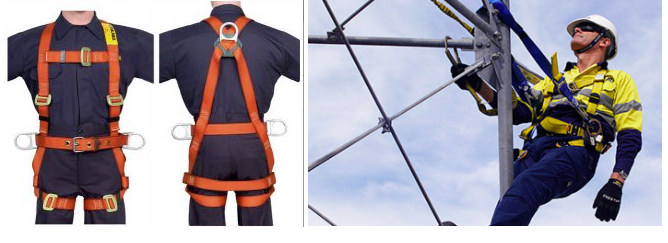
In this case, the harness not only includes all the D-rings found in the previous two types, but also adds a D-ring at chest level (pectoral D-ring). This D-ring is used when there is a need to connect to vertical anchorage systems, such as a rope grab on a lifeline, cable systems with fall arrest devices for fixed ladders, or a backup device in rope access.
(It performs all the functions of the previous harnesses, and more.)
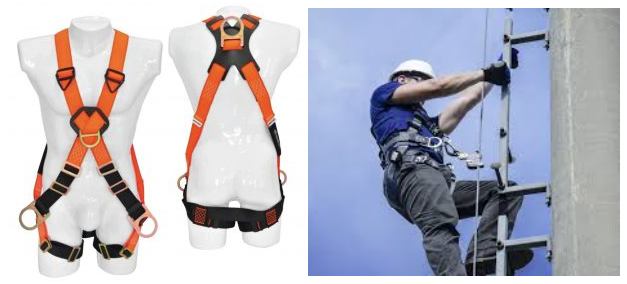
WARNING!!! The chest D-ring is only intended for vertical anchorage systems. A fall arrest system, such as a shock-absorbing lanyard, must not be connected to this point, as during a fall the lanyard could strike your face.
Five D-Ring Harness
This harness includes all the D-rings found in the previous harnesses (the dorsal D-ring, the positioning D-rings, and the pectoral D-ring for vertical anchorage systems). In addition, it also features one more D-ring known as the ventral D-ring, located at the abdomen. Its function is to connect a descent device, which is very common in rescue operations and rope access work.
(It performs all the functions of the previous harnesses, and more.)
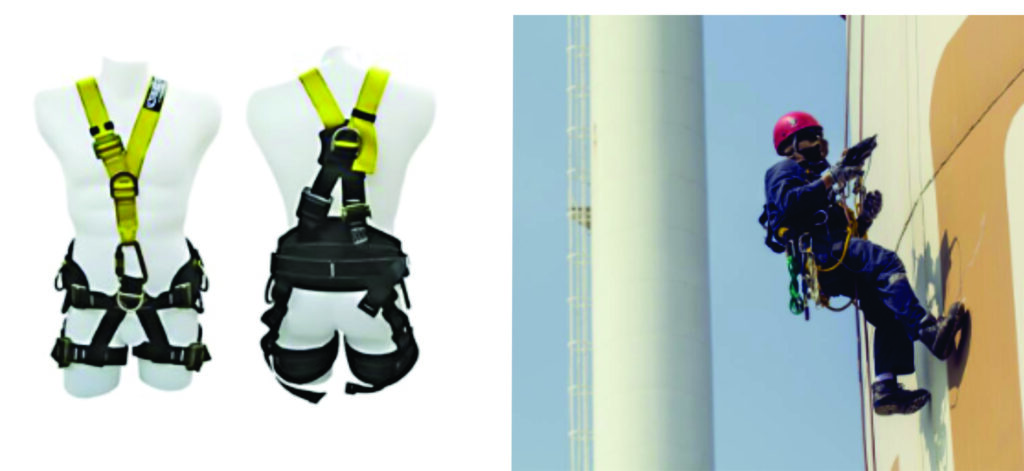
Seven D-Ring Harness
This is a very complete harness. It typically includes all the previously mentioned D-rings and adds two more located at the shoulders. These are used for entry into and rescue from confined spaces. Although the dorsal D-ring (back D-ring) could be used for this purpose, the shoulder D-rings provide much greater comfort for the person being rescued.
Keep in mind that, in many cases, the victim may be unconscious. Thanks to the shoulder D-rings, the victim can be extracted through the narrow opening of a confined space while keeping the body in an upright position.
(It performs all the functions of the previous harnesses, and more.)
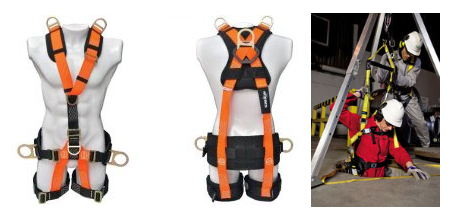
NOTE: There are variations among the harnesses mentioned above. For example, some harnesses may include a pectoral D-ring for vertical anchorage systems but do not have positioning D-rings. Others may have only a single D-ring along with shoulder D-rings for confined space rescue. The possible combinations can vary, which is why, when choosing a harness, it is essential to verify the location of each D-ring.
As you have seen, the difference between the various functions that harnesses provide for the different activities performed at height depends on the number of elements they include. These additional elements allow the user to expand their range of action depending on the scenario.
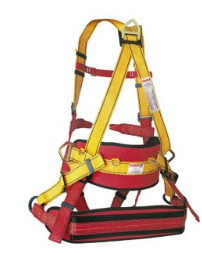
It is also true that as the number of D-rings increases, the harness gains more functions, and its overall shape changes to provide greater comfort. That is why a rescue harness looks very different from a simple harness for work at height. There are even suspension harnesses that include a seat to improve comfort and help prevent suspension trauma, a topic I will discuss in another article. However, regardless of the harness design, they all originate from the same basic foundation.
I hope this information helps you when choosing the harness you plan to use, based on the type of work you will be performing. Remember that when users find themselves in situations their equipment was not designed for, they often improvise solutions that can put their lives at risk.
For this reason, a fall protection plan should always be developed before starting work. This plan must consider which type of harness best fits the specific needs of the task. I have previously written an article on how to properly create a fall protection plan, and I’m sharing the link here for you to review:
I don’t want to take up any more of your time. Thank you for investing it in reading this article.
I’ll close by wishing you a great day.
Until next time and be safe.
Author: Gianfranco Binda
Bison Up – High Access Specialist